How to Fix the “Update failed: Could not create directory., Installation Failed: Could Not Create Directory.” Error in WordPress
Update failed: Could not create directory., Installation Failed: Could Not Create Directory.” Error in WordPress: I know it is an annoying and serious issue if you are a beginner
However, there is some solution that can fix the issue, let’s explore how can we fix this, and also how can we update WordPress, themes, and plugins manually.
If your site’s permissions settings are causing the “update or Installation failed: could not create directory error,” you can resolve it by resetting permissions. To do so, you’ll need to connect to your server via File Transfer Protocol (FTP), using an FTP client like Filezilla, etc.
keep in mind to create a backup of current files and database first, and download them on the system in a safe folder, just in case any error occurs you can restore your website. Create and collect your FTP credentials from your hosting account.
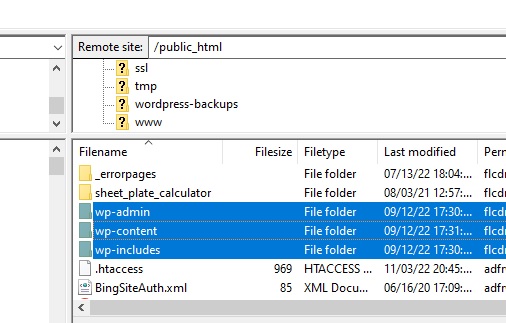
open up FileZilla and enter your FTP login credentials “Host”, “Username”, “Password”, and “Port”. then click on Quickconnect, You’ll be connected to your server, where you should see a folder called public_html. Double-click on it to view your WordPress files:
Then select the folders labeled wp_content, wp_includes, and wp_admin. Right-click on them and choose File Permissions:
You should see a popup window that contains settings somewhat like the below image:

Remember the options here are set to the following values:
- Owner Permissions: Read, Write, Execute.
- Group Permissions: Read, Execute.
- Public Permissions: Read, Execute.
- Numeric value: 755.
- Recurse into subdirectories.
- Apply to directories only.
Click on the OK button to close the window. Filezilla will start changing permissions settings it will take some time, wait until it’s finished, after that return to your site login to your WordPress dashboard and give it a try to install or update the plugin/theme again.

If all the above steps are not working I suggest you try updating manually.
Let’s start the manual update, before jumping to update let’s make sure that we have all the files and database backup saved with us.
To update WordPress manually go to https://wordpress.org/download/ and download the latest version on your system then extract the files, and drag the wp-content folder out from the extracted folder.
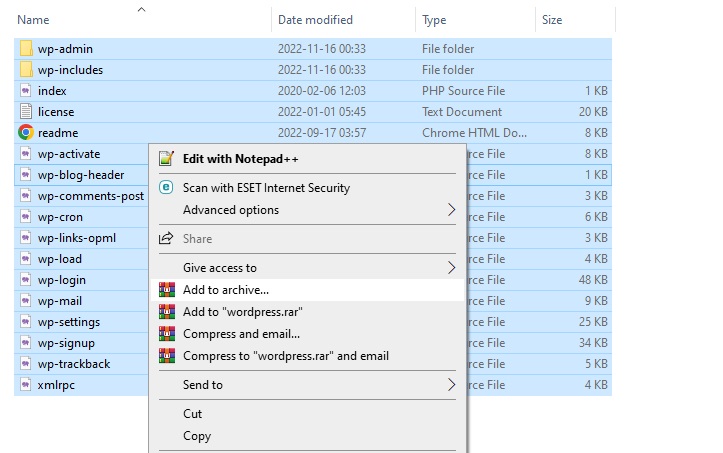
After that select, all files and folders except the wp-content folder, make sure you have no wp-content folder in your current folder.
Select all and click to add to the archive.
Upload the zip file on your server, to the root, or whenever you have installed WordPress extract the files, and it should be done.

reload the admin dashboard to check.
You can follow the same steps to update themes and plugins manually,
For the plugin download the latest version of the plugin in your system you want to update after that extract the files on your system, Select all and click to add to the archive, upload the zip file to the plugin folder, for example, if you are updating Contact Form 7 you should download the latest version of the plugin, extract it on your local system, then archive it, after that upload it on panel’s contact form 7 folder wp-content/plugins/contact-form-7 then extract it.
You can follow the same steps to update themes manually,
For the theme download the latest version of the theme in your system you want to update after that extract the files on your system, Select all and click to add to the archive, upload the zip file to the theme folder, for example, if you are updating Twenty twenty-one theme you should download the latest version of the theme, extract it on your local system, then archive it, after that upload it on cpanel’s twentytwentyone folder wp-content/themes/twentytwentyone then extract it.
Are you still facing issues with updating or installing WordPress? the theme, plugin?
We are here to help you we charge only $14 for installation.
Call us today: +918794147797
Table of Contents